When we embarked on our backyard gardening journey, we decided to utilize raised garden beds to avoid the challenge of revitalizing the hard clay in our native soil. These beds allow for soil customization tailored to the specific needs of various plants, and their elevated height of 17 inches makes tending to them much more comfortable.
However, filling a raised garden bed can become quite costly. For instance, a garden bed measuring 3.5 ft x 6.5 ft x 17 inches has a volume of 32 ft3. Filling it solely with premium potting soil, such as Fox Farm Ocean Forest and Happy Frog, can amount to $252, including weed barriers and mulch, which breaks down to $7.87 per ft3. Keep in mind that these prices reflect our Southern California location and preferences, and they may vary depending on your locality and gardening choices.
Our goal was to fill the garden beds while minimizing expenses. Through extensive research on various websites, books, and forums, we discovered traditional farming techniques like Hugelkultur, which involves using local materials and resources to fill garden beds, thereby reducing costs and fostering a more sustainable gardening approach.
Most plants require at least 6-8 inches of nutrient-rich soil to thrive and establish a robust root system. This means we could successfully grow vegetables such as cauliflower, tomatoes, eggplants, lettuce, peas, and peppers as long as we filled the top 6-8 inches of the beds with quality soil. To save on costs for the lower half of the bed, we opted for the Hugelkultur method.
Cost of Filling a Raised Garden Bed
The total expense for constructing and filling five new 17-inch raised garden beds amounts to $1,587.64, averaging $313.53 per bed. Below is a breakdown of the costs incurred while filling these five new garden beds, which collectively hold a total volume of 135 ft3 using the Hugelkultur method:
Preparing the Raised Bed
Before filling your garden bed, it’s crucial to identify the planting location in your backyard or designated space. Measure the garden bed’s dimensions to ensure it fits properly before assembly. We utilized resources like ShadeMap to determine the optimal spot that receives adequate sunlight throughout the day.
It is essential to level the ground to ensure the bed sits flush; otherwise, soil may leak out.
Assemble the raised garden beds according to the package instructions. We opted for Vego Garden’s classic 17-inch-tall metal raised garden beds, which we assembled over several days.
Once the bed is in place, line the interior with a weed barrier. We chose natural burlap, but you can also use flattened cardboard or commercial weed barrier fabric. If gophers are a concern in your area, consider lining the bottom with chicken wire.
What is Hugelkultur?
Hugelkultur is a gardening technique that employs nearby organic materials to create a healthy and sustainable garden. The term originates from the German words “hugel,” meaning hill, and “kultur,” meaning cultivation. Traditionally used in European forests, this method involves layering decomposing trees, branches, and other compostable materials in a mound that eventually enriches the soil over time.
Today, many backyard gardeners adopt a similar Hugelkultur approach to fill raised garden beds, reducing initial soil costs while enhancing soil health as plants mature. Common materials include wood chips, dried leaves, and compost for the lower layers of their beds.
While not everyone has access to decaying logs or compostable materials, Hugelkultur is just one of many filling methods. For instance, Vego Garden offers a filler called “Soil Saving Floor” for their taller beds, which reportedly reduces the soil volume needed by over 50% for beds that are 32 inches tall.
To fill our five new garden beds, which required a total of 135 cubic feet, we implemented a Hugelkultur method using local materials such as dried logs, branches, straw, high-quality potting soil, fertilizer, mulch, and other amendments. This approach cost us $747.54 in total (or $5.53 per cubic foot), resulting in a 30% savings compared to filling the beds entirely with premium soil, which would have totaled $1,063.05 (or $7.87 per cubic foot).
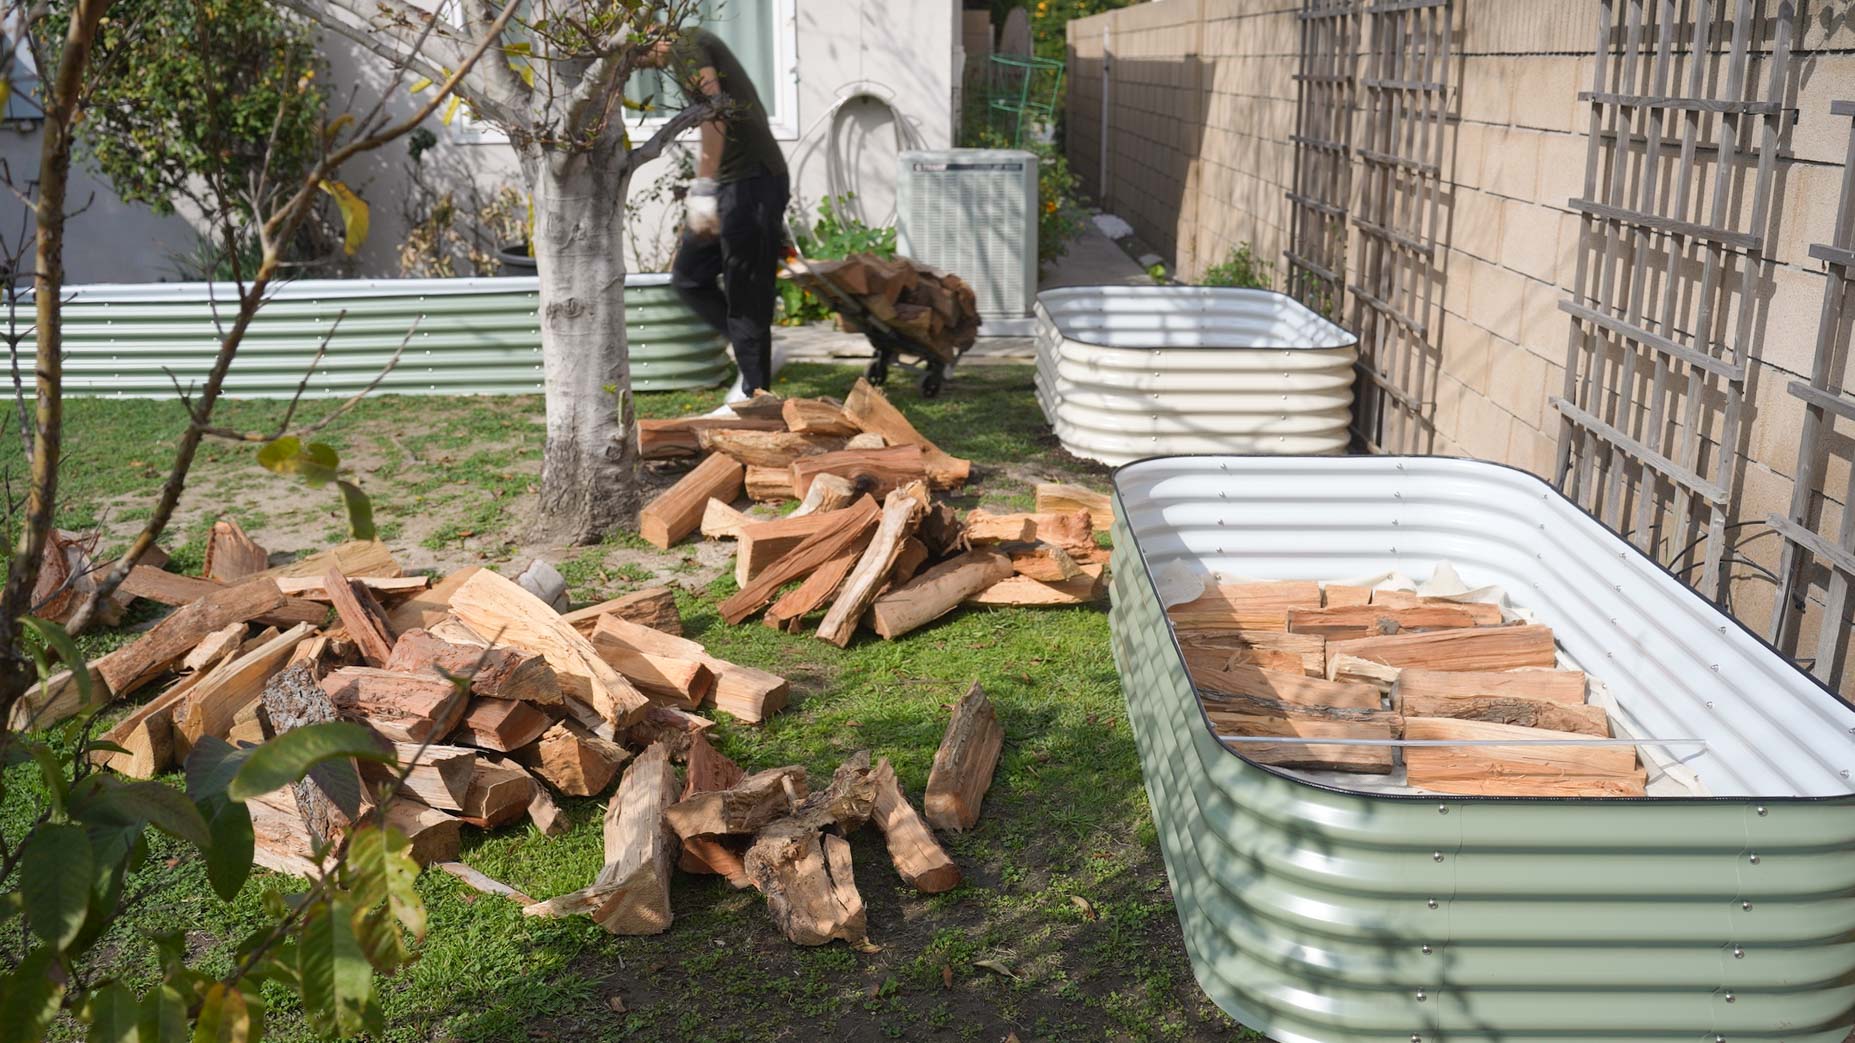
The Bottom Layer: Woody Materials
For the bottom layer, using rotten wood is ideal due to its rapid decomposition rate, which enriches the soil without depleting nitrogen. However, if rotten wood isn’t available, we used dried, seasoned wood from a local lumber shop and fallen branches from our Alderwood tree.
A mix of softwoods (like Alderwood or pine) and hardwoods (like oak) can be used. However, certain species, such as black walnut, are known to release allelopathic chemicals that may inhibit the growth of nearby plants. While research is ongoing regarding these trees, we generally avoid them.
This bottom layer should occupy about 30% of the garden bed’s volume. Since we didn’t have enough wood on hand, we purchased a ¼ cord (or 32 ft3) of dried wood from a local firewood supplier for $160. For each 3.5 ft x 6.5 ft x 17 inch bed, we required nearly 5 ft3 of logs, costing around $25 per bed.
The Middle Layer: Compostable, Organic Materials
Next, add organic and compostable materials to cover another 20% of the garden bed. Suitable options for this layer include:
- Straw
- Fresh grass clippings
- Fallen leaves
- Mulch
- Fresh organic matter (such as banana and orange peels, vegetable scraps, etc.)
At this stage, approximately 50% of your bed should be filled. We recommend watering the top layer to help moisten the filling and encourage settling. Be prepared for the layers to compress over time; watering beforehand helps create more compact layers.
We spent $30 on one bale of hay, which covers 18 ft3. For each 3.5 ft x 6.5 ft x 17 inch bed, we needed just over 3 ft3, costing about $5 per bed.
Top Layers: Soil
The top layer of the garden bed should be filled with high-quality soil (and compost if your potting mix doesn’t already include it). We use a blend of FoxFarm Ocean Forest and FoxFarm Happy Frog potting mix, which features a rich combination of worm castings, fish emulsion, and aged forest compost.
For a more budget-friendly alternative, consider mixing topsoil from your property with nutritious compost, worm castings, perlite, vermiculite, and other beneficial additives.
After filling the bed with topsoil, spray it with water to help it settle before planting! Once your plants are in their new homes, adding a mulch layer will help retain soil moisture.
For each 3.5 ft x 6.5 ft x 17 inch bed, we spent $235 on a mix of Ocean Forest and Happy Frog to fill 32 ft3.
Tips
Here are additional tips for minimizing expenses when filling a raised garden bed:
- Keep each layer moist by watering between layers.
- Utilize local resources to acquire free or inexpensive materials:
- Local city and county recycling centers may provide free or discounted compost and mulch. Our municipal recycling center offers this service where you can sign up for a pick-up time online, bring your own containers and shovels, and take as much as needed.
- Ask friends and family for organic materials they may have. We collected some old wooden logs from friends.
- Check your own home for usable materials (we used trimmings from our Alder tree).
- Look for sales on raised bed potting mixes during the planting season; nurseries and big box stores often have promotions in the spring.
- Explore hydroponics stores that sell bags of potting mix at lower prices; our local hydroponics store offers Ocean Forest for nearly 50% off compared to nurseries and garden centers.
- Consider using ChipDrop, a service that provides free wood chip and log delivery to your home, with some conditions, such as a minimum order of one truckload and limited variety options based on local arborists. You can specify varieties you do not want in the notes. Note: We have not personally used this service, so be sure to read their FAQs to understand what to expect.
- Check Craigslist for offers of free wood and mulch. Always inquire about the type of wood and whether it has been treated.